
Showing posts with label beauty. Show all posts
Showing posts with label beauty. Show all posts
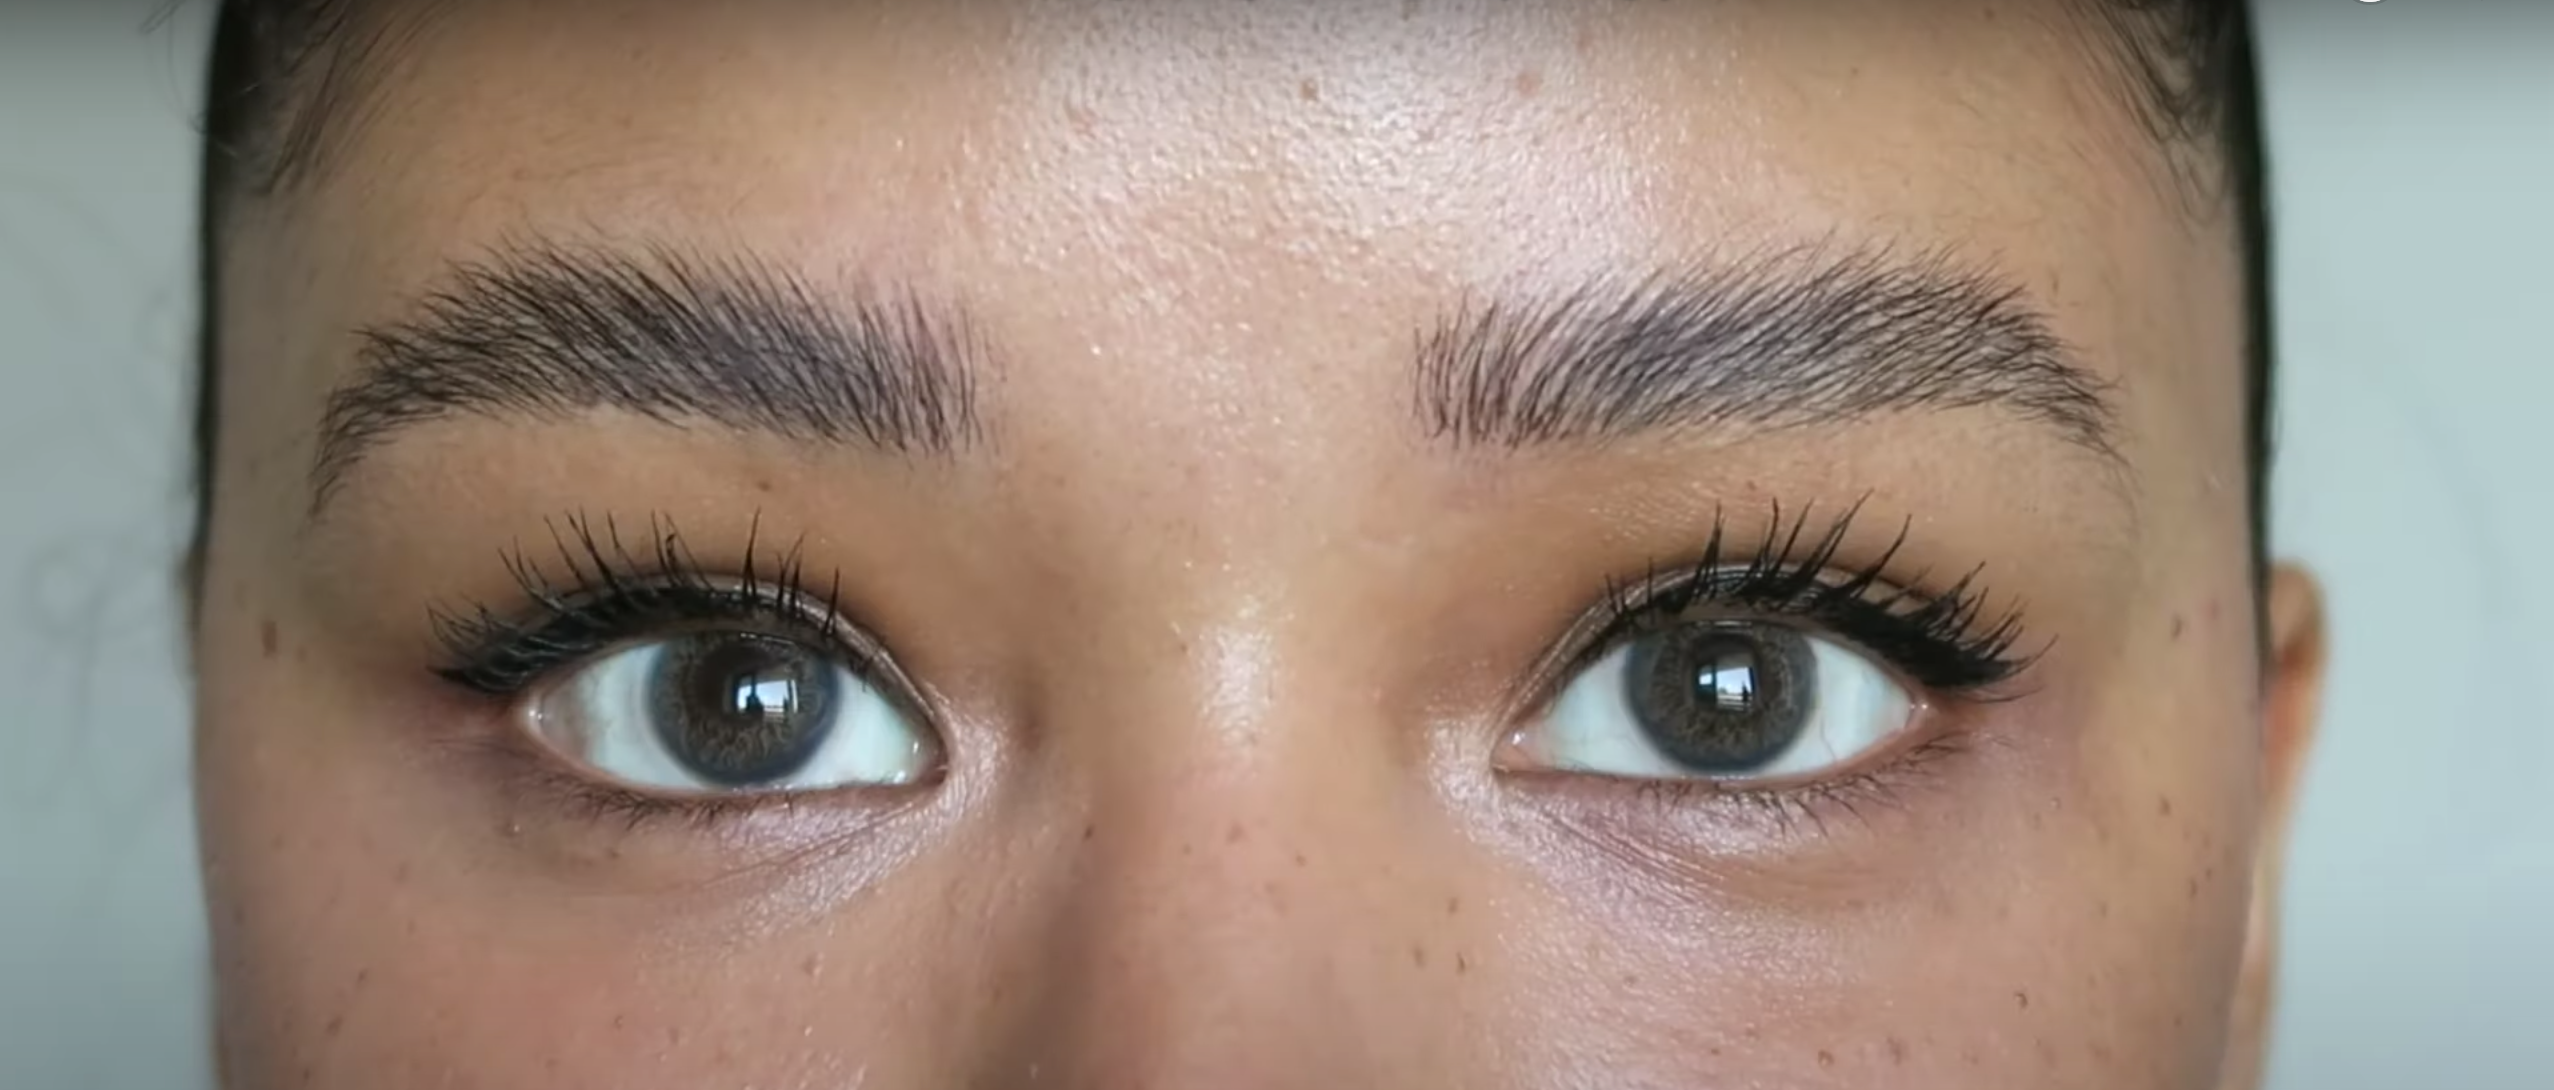
If like me you've been adoring other people's fluffy laminated eyebrows, you've come to the right place! This is my step-by-step, easy-to-follow, at home brow lamination tutorial. I'm showing you how to do the treatment yourself and everything you'll need to do it at home. This how-to tutorial is also available in youtube video format at the bottom of this page.
DISCLAIMER
Please be careful when you're doing this treatment and also read all of the instructions within the kit you are using. If you are not confident or do not have a steady hand it's best to visit a brow technician instead.
WHAT YOU WILL NEED
1 -A brow lamination kit OR lash lift kit
I use a lash lift kit by Iconsign which is available HERE and includes all the solutions (perm, fixation, cleanser, and nutrition), glue, and tools. Most lash lift kits and brow lamination kits contain the same products, so you can use either.
2 - Cotton rounds and earbuds
These are used for any cleanup needed
3 - Cling film (also known as saran wrap or plastic wrap)
This will be used to hold your eyebrow hairs in place during the process
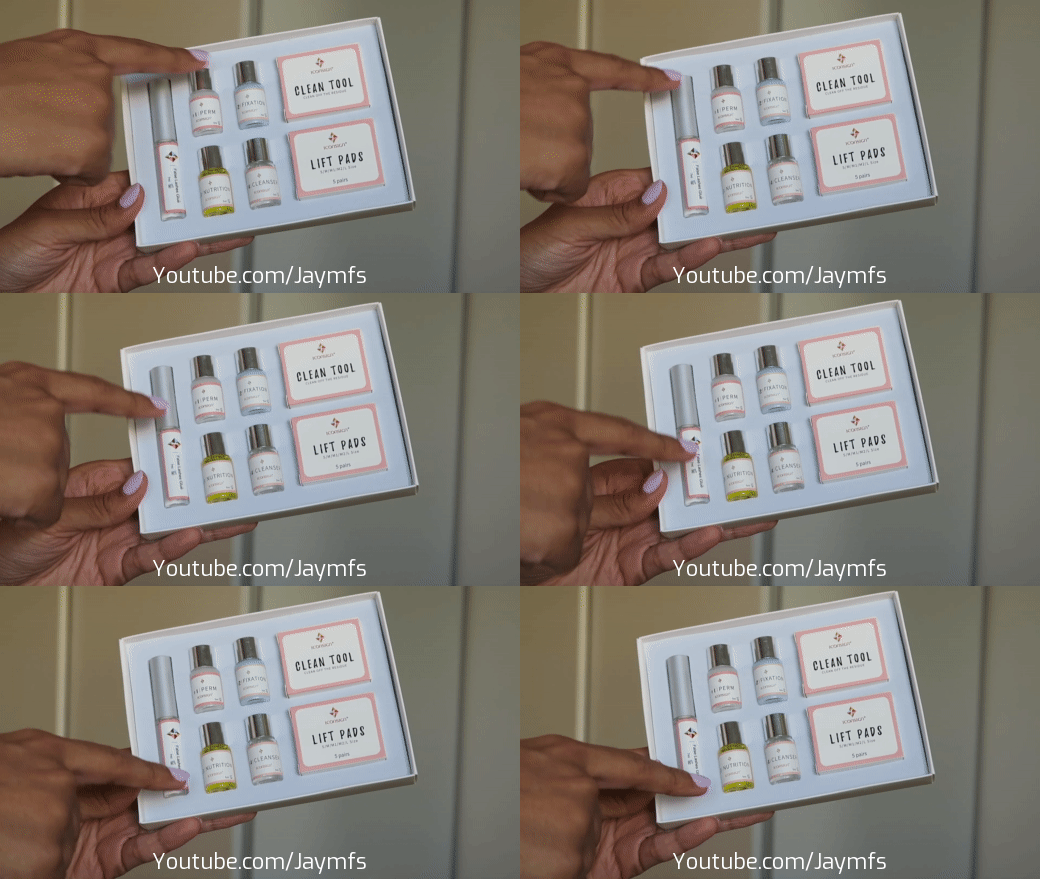
HOW TO DO A BROW LAMINATION AT HOME GUIDE
STEP ONE - Cleanse the area
Apply the cleanser to a cotton round and thoroughly clean your brow area. Then brush your hairs upwards into your desired position. Do not worry if they don't go all the way up right now, just aim to get them a big higher.

STEP TWO - Apply the perm solution
Apply the perm solution all over your eyebrows using a small applicator, making sure all the hairs are coated. Whilst you're doing this try to push your eyebrows up into your desired position.
Once you have applied the perm solution, cover your brows with the cling film and set your timer for 5 minutes or the amount of time your kit recommends.
Half way through at 2:30 peel off the cling film and use a small spoolie brush to brush your eyebrows up into your desired position. They will be far easier to position and style now as the perm solution has started working. Once brushed cover them with the plastic again for the remaining time.
Once the time is over, clean off the remaining solution using the flat side of the Y brush or a cotton bud. Afterwards use a slightly damp cotton round to make sure everything is removed.
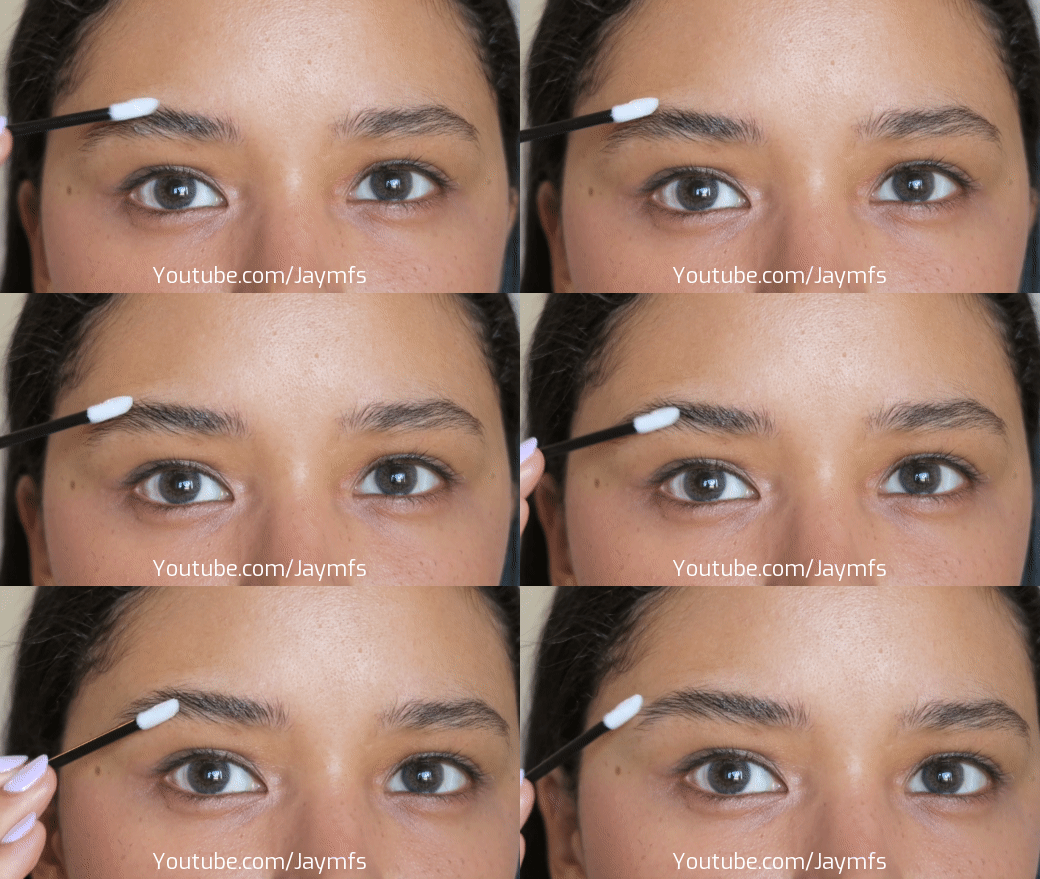
STEP THREE - Apply the fixation solution
Apply the fixation solution all over your eyebrows using a small applicator, making sure all the hairs are coated. Be sure to use a fresh applicator for this. Whilst you're doing this push your eyebrows up into your desired position. They will be easier to style now.
Once you have applied the fixation solution go in with a small spoolie brush and brush your brows up into the final position you would like them to set in.
Once in position, cover you brows with cling film again (a fresh piece) and leave this on for 5 - 7 minutes, or however long your kit advises you to.
Once the time is over clean off the remaining solution using the flat side of the Y brush or a cotton bud. After use a slightly damp cotton round to make sure everything is removed.

STEP FOUR - Apply the nutrition solution
Using a cotton bud apply the nutrition solution all over your brows. Use a clean spoolie to brush the nutrition through your eyebrows. Leave this on for 5 minutes, or however long your kit advises.
Once the time is over, remove the nutrition solution with a cotton round.

BROW LAMINATION AFTERCARE
Here's what you need to know about caring for your eyebrows after a brow lamination:
- Do not get your eyebrows wet for at least 24 hours
- Avoid brow makeup for at least 24 hours
- Keep your eyebrows in a brushed up position. If you move them whilst changing or sleeping just brush them up again

VIDEO TUTORIAL
You can check out my video tutorial below for a demonstration of how to do this treatment, and I also explain everything else you need to know. This video includes before and after videos/pictures, aftercare advice and styling advice.
I hope you found this helpful! Please like and share this blog post or the video if you did.
Until next time, J xx

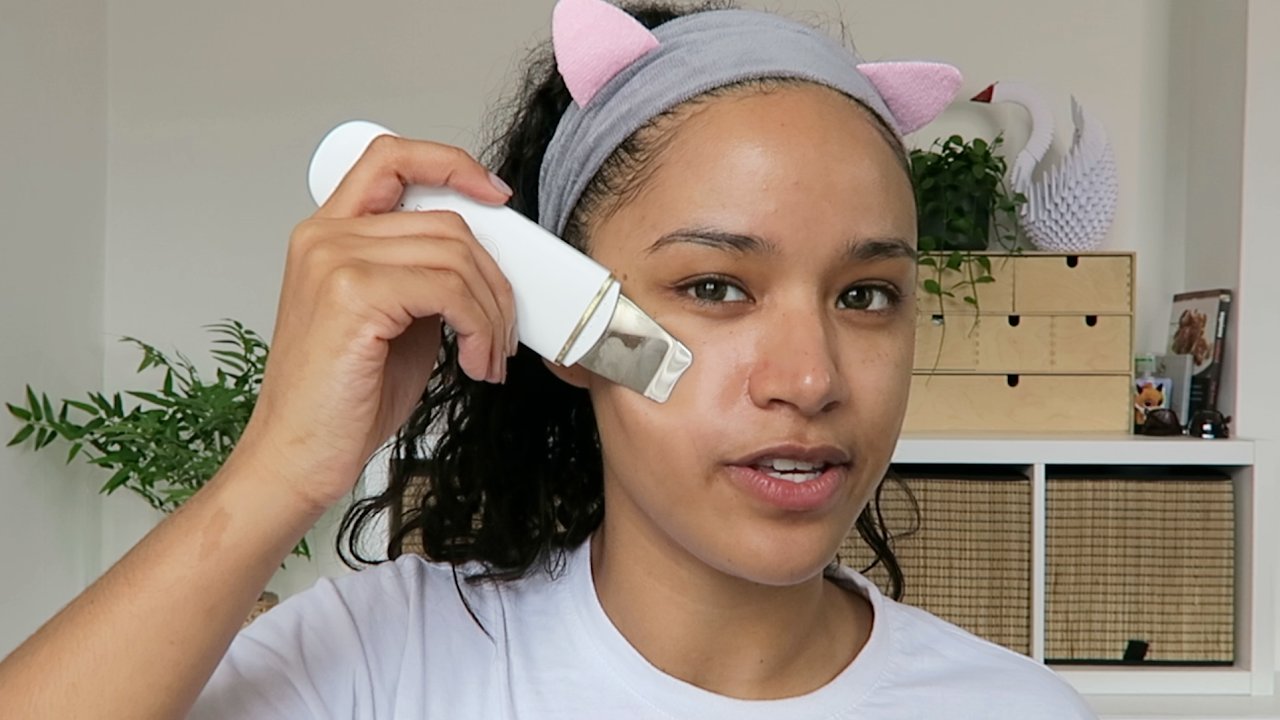
I am a sucker for a random skincare tool, so when I received this as a gift from my sister I was overjoyed. I'd seen skin spatulas online for a while, and today I'm going to run you through the basics of what they are, the benefits, and how to use them.
What is a Skin Spatula?
Also known as an ultrasonic skin scrubber, skin spatulas use high frequency to collect dirt and oil from your pores. They are also able to gently exfoliate your skin and take off the dead skin cells and dirt that's been drawn out. Their benefits include:
- Skin exfoliation
- They improve skin tone and texture
- Deep skin cleansing
- They are a gentle form of exfoliation
Another use for the skin spatula I'm using (available HERE) is it has ion+, ion-, and a skin firming mode.
The skin-firming option uses vibration to lift and tone your skin. The ion+ mode is used to enhance the cleaning effect and draw more dirt and oil out of your skin. The ion- mode uses a different frequency to push more product into your skin. This is great to use with facial oils and other treatments that you would like to penetrate your skin even more.
I have a full video tutorial on how I use this product at the bottom of this page, but below I'll run you through the basics:
The skin spatula I am using is by Gugug (available HERE)

It has four options which are cleaning, lifting, ion+ and ion-. Cleaning mode is self-explanatory, but it is also used for exfoliation. You want to lubricate your face in some way before using this mode, ideally with a cleanser or alternatively, you can use water. When using this mode you want the spatula to be in the angle shown below.

Ion+ is the deep extraction mode. This is what you use when you want to get all the oils, dirt and blackheads/whiteheads out of your skin. When using this mode you need something to lubricate the skin. You can use a blackhead extraction cream/oil/spray or alternatively you can use water. I use steam from my facial steamer. For this mode (and all modes other then the cleaning mode) you need to flip the spatula around the other way. See the video at the bottom of this page for a demonstration.
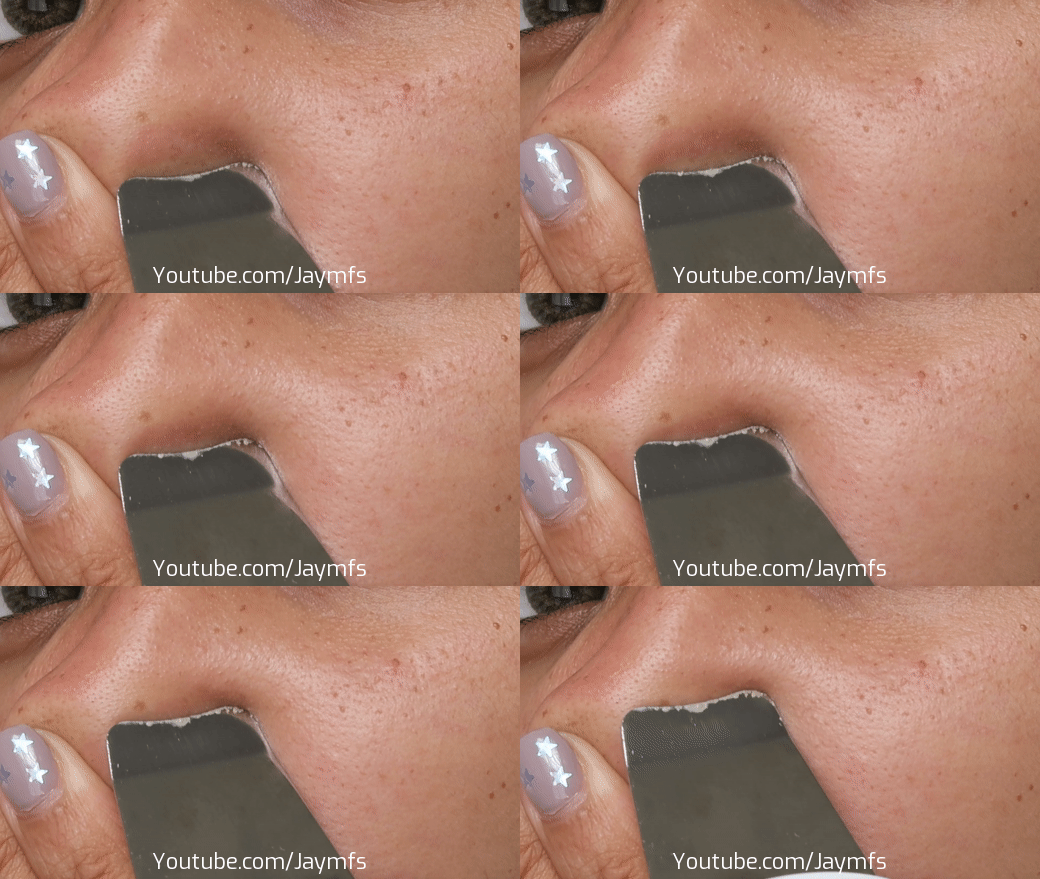
Ion- mode helps products go deeper into your skin. You can use this after applying your favourite serum to enhance its effect, or like me, you can use it after a sheet mask to help the leftover mask serum penetrate your skin more. Run the spatula across your skin, starting from the center of your face and working your way out.

Lifting mode is for firming and tightening the skin. You can use a firming or anti-aging oil/cream with this to enhance the effect and lubricate the skin. Alternatively, you can use water if you have nothing else. Your skin just needs something to help the spatula glide across easily.
For a full step by step guide on how I use my skin spatula / ultrasonic skin scrubber as part of my at-home facial routine watch the video below:
I hope this helps any of you who have been keen to try this device! Until next time, J xx

If you're interested in doing your own lash lift at home you're in the right place! Here's my easy-to-follow step-by-step home lash lift guide, which is also available in two Youtube video tutorials at the bottom of this post.
DISCLAIMER
Please be careful when you are doing this treatment, and read all of the instructions within the kit you are using beforehand. If you are not confident or do not have a steady hand it's best to visit a lash technician instead.
WHAT YOU WILL NEED
1 -A lash lift kit
I use a kit by Iconsign which is available HERE and includes all the solutions (perm, fixation, cleanser and nutrition), glue, and all the tools you will need.
2 - Cotton rounds and earbuds
These are used for any cleanups needed, and occasionally for application.
3 - Cling film (also known as saran wrap or plastic wrap)
This will be used to hold your lashes in place during the process.
STEP BY STEP HOW TO GUIDE

STEP ONE - Clean the area
Clean your eye area with some water to remove any dirt/dust, and make sure to dry the area after.
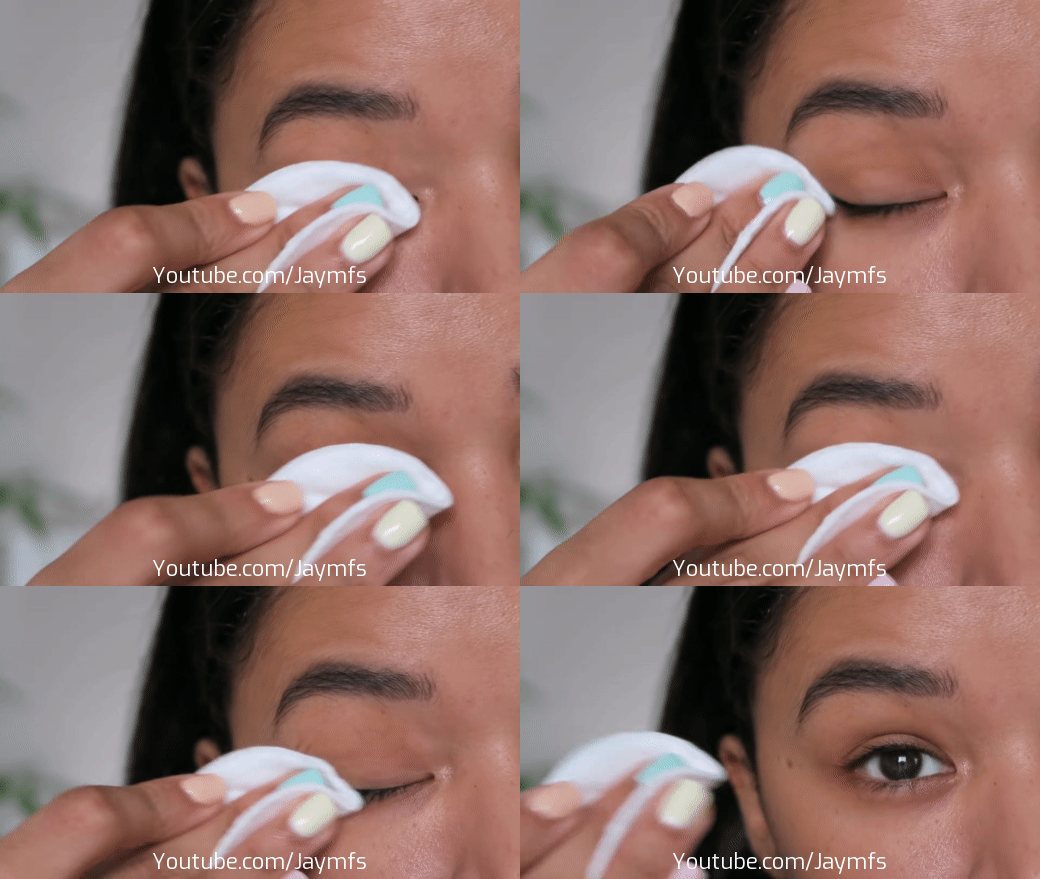
STEP TWO - Tape down your lower lashes
This is to keep them out of the way whilst you are perming the upper lashes. You can use the eye pads provided in the kit, or you can use lash tape which is available HERE.

STEP THREE - Stick the lift pad to your eyelid
After choosing which size lift pad you will be using, apply glue to the back and stick it to your eyelid.
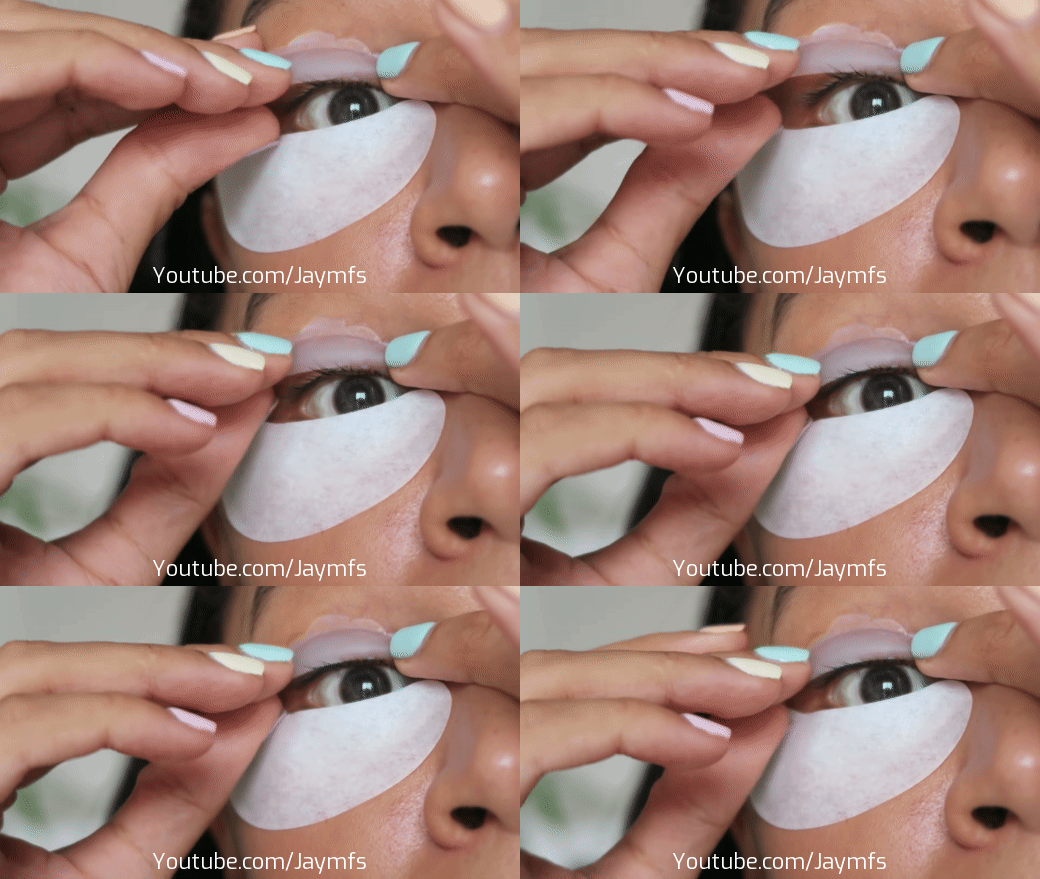
STEP FOUR - Stick lashes to the lift pad
Do this in small sections. First, apply glue to the lift pad. Once it has become a little tacky use a small brush (if your kit includes a Y brush use the comb side) and brush your lashes onto the pad so they stick to the glue. Aim to make all lashes straight and separated. See the second video at the bottom of this page (using the large lift pad) for my best example of this.

STEP FIVE - Apply perm solution
Using a small applicator brush apply the perm solution to your lashes. Focus the solution on the middle of your lashes, avoiding the roots (waterline) and the very tips.
Once applied cover your lashes with the cling film and leave the solution on for 8 to 10 minutes. Kits may vary, so please check the development times listed on your kit before application.
Once the time is over, clean off the remaining solution using the flat side of the Y brush or a cotton bud.

STEP SIX - Apply fixation solution
Using a small applicator brush apply the fixation solution to your eyelashes. Be sure to use a fresh applicator and apply the fixation solution to the same area you applied the perm solution.
Once applied, cover your lashes with cling film (a fresh piece) and leave the solution on for 8 to 10 minutes. Kits may vary so please check the development times listed on your kit before application.
Once the time is over, clean off the remaining solution using the flat side of the Y brush or a cotton bud.

STEP SEVEN - Apply nutrition solution
Use a cotton bud to apply the nutrition solution to your lashes. Once applied leave this on for 5 minutes, or for however long your kit recommends.
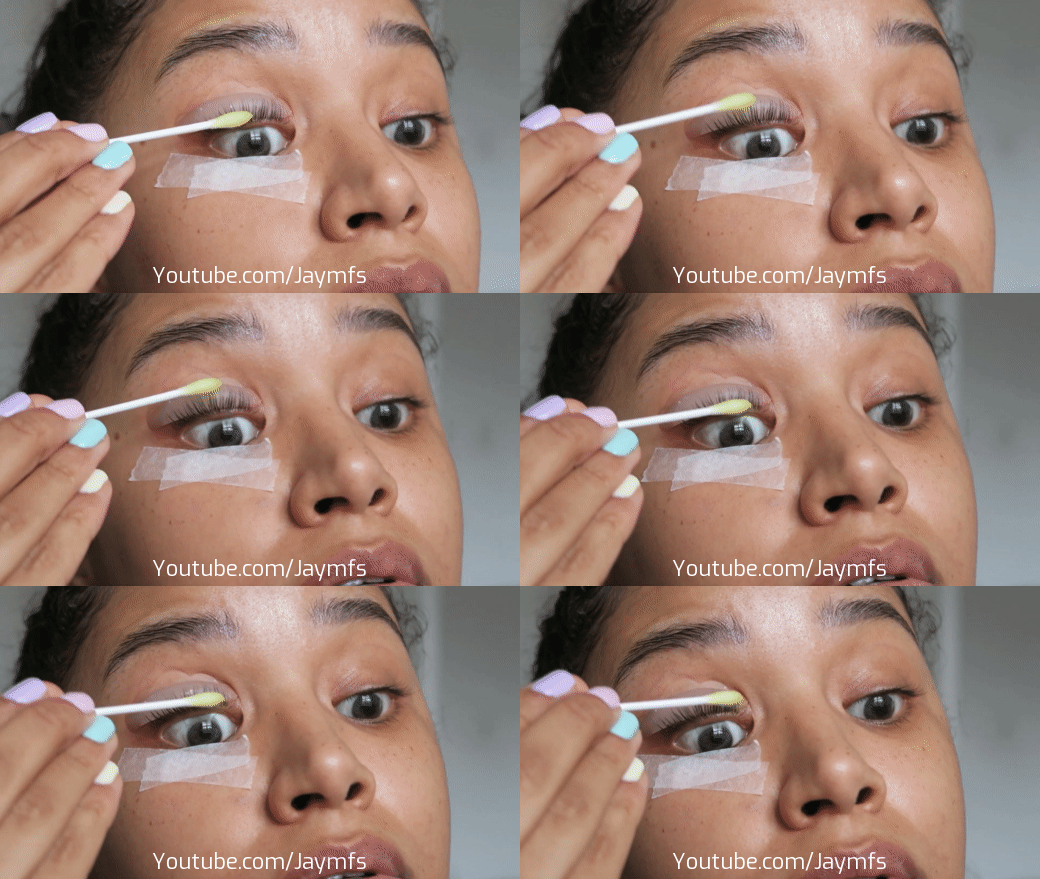
STEP EIGHT - Remove the lift pad
Using the cleanser and a cotton bud, remove the lift pad from your eyelid and lashes.

LASH LIFT AFTERCARE
Here's what you need to know about caring for your eyelashes after a lash lift:
- Do not get your lashes wet for at least 24 hours
- Leave your lashes alone and try not to sleep directly on them
- Avoid eye makeup for the first 24 hours
VIDEO TUTORIALS
I have made two videos on at-home lash lift kits that you can watch here. I recommend watching them both so you can see the application process and also see the difference between using a small and a large size lift pad. I have more experience in the second video so watch that one (using the large lift pad) for a clearer application demonstration, I also talk about what I regret about my first time trying in the first video.
My first lash lift (using the small lift pad)
My more experienced lash lift tutorial (using the large lift pad)
I hope you find this post helpful! Please like and share this post or the videos if you did.
Until next time, J xx


SUGAR CRUSH - the one for lime lovers
Let's start with the most popular one. So many people have recommended this to me and I knew from the second I opened it that it was because of the scent. The lime smells amazing and it's the closest thing I've smelt to a mojito style cocktail in months, thanks lockdown. I had really high hopes, but this is definitely my least favourite. Of all three it has the runniest consistency, the least scrub power and if it wasn't for the scent I wouldn't rate it much. Such a shame! But if you're into citrus scents you will love this, and it's a great smell to wake up to.

FLAKE AWAY - the one for moisture lovers
I definitely prefer this to the lime one, but it's still not doing it for me in the scrub power department. One department it does win in though is the moisturising one. Of all three I found this one the most moisturising, so if you have dry skin you'll love it. It also smells divine! This is exactly the scent I would associate classic Soap & Glory products with and of all three this one's scent holds on my skin the longest. I think some of the scrubby bits in this are too big though. They are not small enough to do much for me, but remember, my scrub standards are high! For the average person this will probably be fine.

BREAKFAST SCRUB - the one for exfoliation lovers
As expected Breakfast Scrub is the absolute king of Soap & Glory scrubs and I will not be told otherwise. It is the PERFECT consistency to give you a powerful scrub that gives instant results. It stays on the skin whilst you're rubbing it in (rather than slipping off after a few rubs) and smells absolutely fantastic. It literally makes me hungry every time I open it because the smell is that good. The thicker consistency means you use less product, and while the other two scrubs are almost empty after this experiment this tub is still going strong.

So overall, another day has gone by and I still haven't found a better body scrub than Breakfast Scrub. I'm open to suggestions though so comment your favourite below!
All are available at boots in the UK (click here) and Ulta in the US (click here)
Until next time, J xx


My daily skincare starts with cleansing in the shower. It’s got to be quick, it’s got to be easy and it’s got to be affordable. Don’t get me wrong, I love a luxury cleanser, but I tend to save those for days where I’m wearing a full face of makeup, and these days that's never.
I’ve been trying drugstore brands (stuff I can find during the weekly Tesco shop lol) over the past 6 months and to be honest none of them left me wanting to buy again. So I decided to broaden my horizons and have a browse through some Korean beauty cleansers. That’s when I found Nature Republic’s Snail Solution Foam Cleanser face wash.

It’s £12 a tube but the amount you get vs the tiny amount you use every day makes this worth every penny! It’s going to last me ages and when you take that into consideration this is a bargain buy.
It’s a cream to foam formula which you only need a pea-sized amount of to cleanse your whole face. Apparently it’s vanilla scented, but personally I thought it was unscented as it only smells like soap to me. The lather it creates is thick, luxurious, and easily comparable to high-end brands. I would have happily paid more for this, but luckily I didn’t have to.

It’s formulated with snail secretion. For those of you who don’t know what that is, it’s the slime that snails leave behind when they move. Don’t worry it’s purified before being added to products and its benefits for the skin are endless. It’s known for repairing skin damage, fighting blemishes, evening skin tone, tightening skin, boosting elastin and collagen production, and more! If this doesn’t sound like the perfect way to start your skincare every day I don’t know what does.

p.s. I’m a huge lover of K Beauty products so if you have any favourites you think I should try let me know in a comment below!
It’s a cream to foam formula which you only need a pea-sized amount of to cleanse your whole face. Apparently it’s vanilla scented, but personally I thought it was unscented as it only smells like soap to me. The lather it creates is thick, luxurious, and easily comparable to high-end brands. I would have happily paid more for this, but luckily I didn’t have to.

It’s formulated with snail secretion. For those of you who don’t know what that is, it’s the slime that snails leave behind when they move. Don’t worry it’s purified before being added to products and its benefits for the skin are endless. It’s known for repairing skin damage, fighting blemishes, evening skin tone, tightening skin, boosting elastin and collagen production, and more! If this doesn’t sound like the perfect way to start your skincare every day I don’t know what does.

My skin (oily combo) has been absolutely loving it. I’ve also noticed fewer breakouts and more oil control whilst using it, plus it’s never dried me out! It’s become my go-to cleanser and I haven’t even been tempted to look at others since switching to this. So if you’re looking for an affordable addition to your skincare routine I highly recommend giving this a go.
UK link - https://amzn.to/3umkGpc
US link - https://amzn.to/3pjlJT7
p.s. I’m a huge lover of K Beauty products so if you have any favourites you think I should try let me know in a comment below!
Until next time, J xx


If there's one thing I can't stop buying right now it's skincare. I mean, what else is there to do during lockdown other than pamper yourself? So here's two quick reviews on my newest face mask buys from The Body Shop
Let's start with the Nicaraguan Intense Coffee Awakening Mask


As a lover of Bean Body's coffee exfoliating face scrub, I thought this mask would be right up my street. But much to my surprise I'm not that keen.
The mask has a gel like consistency which warms on your skin. The smell is a gorgeous coffee scent and there's a good amount of exfoliating pieces that give you a nice scrub when washing it off. My skin did feel fresh and clean afterwards but I didn't get much glow. The reason I'm not keen on the mask though is that it left my face feeling quite sensitive to the touch. I did leave the mask on for longer than recommended so this could be my own doing, but overall I just don't feel like it agreed with me.
The Japanese Matcha Tea Pollution Clearing Mask however was a completely different experience...


I was drawn to this mask because of its pollution clearing claims. As someone who lives in a dirty city that really appealed to me and this mask did not disappoint. It's a creamy mask that felt great on my skin and the results left my face feeling calm, moisturised and like I'd just had a spa facial. Whenever I use this I can't help but touch my face afterwards. It's so soft to the touch and has a lovely glow. Of the two it's clear this mask is my favourite and I can see myself buying it again soon.
One thing I loved about both though is that they are available in mini sizes. The regular sized pots are £18 each which has always put me off because that's almost £20 wasted if you don't end up liking it. The mini pots are just £6 each and I reckon you can get up to 5 uses out of them, which is great for the price!

If you've tried any of The Body Shops face masks before let me know! I'll definitely be ordering more minis soon and could use some inspiration.
Until next time, J xx

Subscribe to:
Posts (Atom)


Social Icons